


A Step-By-Step Guide For Cleaning Your Inbox (even if you have 10,000+ emails)
The first step alone can help you clean 80% of your inbox

Here is my inbox:

I cleaned 9,563 emails in 2 days.
Why?
I wanted to find information quickly.
I didn’t want to miss important messages.
I wanted to have peace of mind knowing my digital place is clean.
Most people have cluttered inboxes, know they should clean them, but don’t know where to start.
I’ll share a 3 step guide to help you clean your inbox once and for all.
The 1st step will help you remove 80% of your emails.
The 2nd step explains the three actions you should perform on important emails.
The 3rd step will guide you through maintaining a “clear inbox” system.
*This guide will focus on Gmail, but you can do these steps with every email client.
Before you use this guide
Do the following to make this process easier:
Enable “Auto-Advance”
Go to Gmail Settings → Advanced → Auto-advance and enable it.
Performing an action on an email automatically moves you to the next email.

Learn shortcuts
Keyboard shortcuts make everything easier.
It saves seconds every time you perform an action and makes you feel like a badass (trust me).
Here are a few shortcuts worth knowing:
Archive — E
Compose new mail — C
Reply — R
Reply all — A
Forward — F
Go to inbox — G + I

Disable categories
Categories seperate your inbox into more buckets.
We don’t need 5 inboxes. We barely manage one.
Having one inbox forces us to deal with every email that comes our way.
You will become more mindful of the websites you sign up for and what emails deserve attention.

Step 1: Cleaning 80% of your inbox
Scan your inbox.
Look for the obvious emails you don’t want to see.
I’m talking about the easy choices:
LinkedIn notifications
Instagram updates
Product promotions
Newsletters you never read
These emails take up most of your storage space.
When you spot these emails, do the following:
Search for the title or sender name (to get all the messages of the same type)
Click “Select all” to select all the messages on the current page.
Click “Select all conversations that match this search.”
Click E to archive - or click the archive button.


Step 2: Sorting the Important Stuff
Here is the process for the messages you actaully want to interact with:
Open the first mail in your inbox.
Optional: If it takes less than 2 minutes, read, reply, or forward the mail.
Make 1 out of 3 actions listed below to remove it from your inbox
You do the same for the next email (If you enabled auto advance, it should take you to the next one automatically)
Here are the 3 actions you need:
1. Archive (E): Clean your inbox
When you finish with an email and do not intend to look for it in the future, hit ‘E’ to archive it.
Archive does not mean Delete. It just removes your mail from your inbox.
You can still search for this mail or find it under the “All Mail” section.
2. Move (V): Organize in labels
“Move” should be your most used action.
“Move” is a combination of archiving and labeling. Archiving removes a message from your inbox, and labeling applies a tag to it.
Labels allow you to organize your emails and make it easier to retrieve information from them.
They are like folders and you can have as many of them as you want. Labels appear in the left sidebar and are searchable.
Common use cases for moving an email:
You finish with an email but need to access it sometime in the future.
Replying will take you more than 2 minutes (you should move it to a “to-do” label or create a task for it in your to-do app).
It’s a long email you need to read (you should move it to a “Read Later” label).
3. Snooze (B): I’ll deal with you later
Snoozing means receiving the email to your inbox again at a different time.
Snoozing is especially helpful for:
Needing a reminder about a task.
Don’t want to answer now.
Following up with someone later.
This action lets you get your emails when you want to get them.
You gain control.
Step 3: Automating
By this point, your inbox should be clean.
(If it’s not clean yet, let me know why in the comments below, and we’ll figure it out.)
But if we don’t create the right systems, we’ll once again have messy emails.
Every time you log into your mail, look for ways to use these two actions:
Filtering
Filters automatically perform a set of actions on incoming mail.
When you perform an action more than once, you should consider automating it with filters.

To filter emails, select them and click “Filter messages like these”:

Then you’ll specify in what condition will Gmail filter your messages and what action will it perform on them.
Filtering allow you to deal with fewer emails and focus only on the ones requiring your attention.
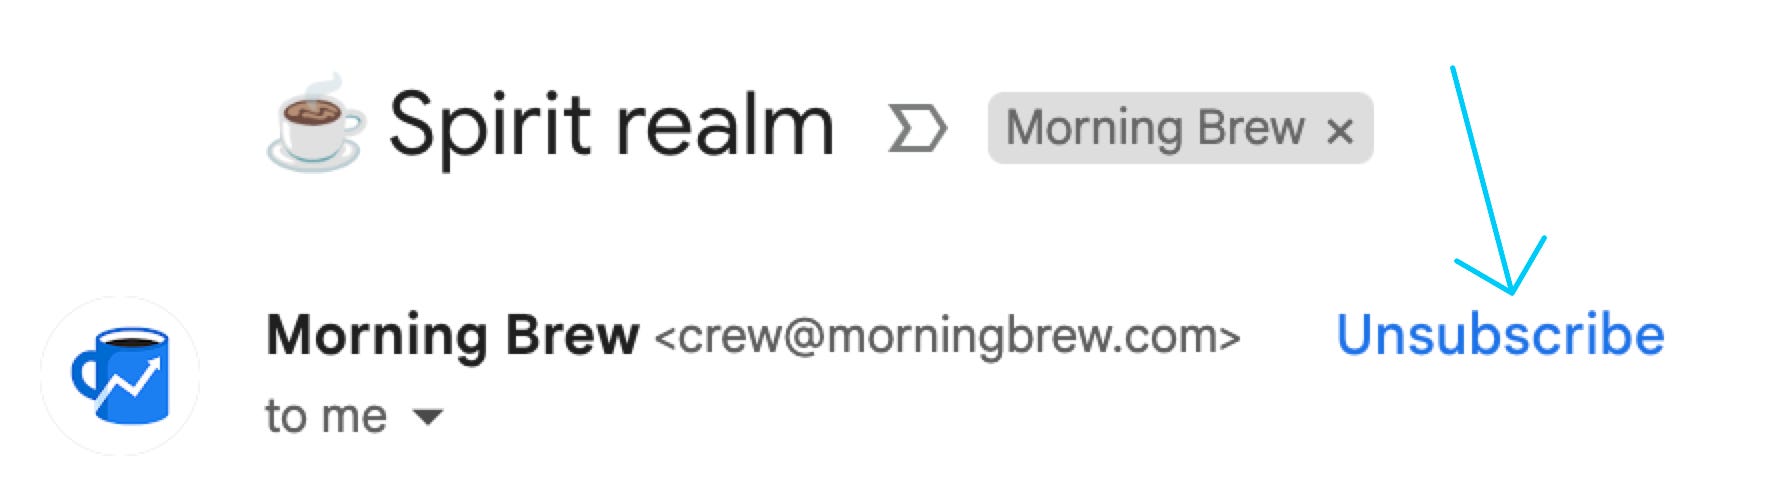
Unsubscribing
Fewer emails = Less time. Think:
What types of emails do you need in your inbox?
What newsletter do you read?
Which updates benefit you?
When you unsubscribe from a sender, you save a lot of time for your future self.
Gmail makes it easy for you to unsubscribe. You can do it from the top of the email with a dedicated button.
That’s it!
For more minimalist productivity tips:
Follow me on Twitter.
Subscribe!