4 Things I Wish I Knew Before I Started Using DALL-E 3
DALL-E 3 is the latest text-to-image model developed by OpenAI (the creators of ChatGPT).
In simple words, DALL-E creates beautiful, never-seen-before images from your decriptions.
But just like ChatGPT, using DALL-E effectively is more complicated than writing a sentence. It took me a few weeks to understand how to write prompts that got me the exact picture I wanted.
Why I Use DALL-E 3
Before DALL-E, I used sites like Unsplash to find photos that I could legally use for my blog posts and Twitter threads.
These images are great, but they have become overly used, and I get tired of using the same style of images in all my blog posts.
DALL-E images are free to use, and I have much more freedom to create unique-looking blog post images.
How to use DALL-E 3?
You need a ChatGPT plus account, and then just ask for an image in the chat.
These tips will probably work well with other image-to-text models, such as Midjourney and Stable Diffusion (which is free to use).
Here are 5 things I learned about using DALL-E more effectively:
1. DALL-E does not show text well
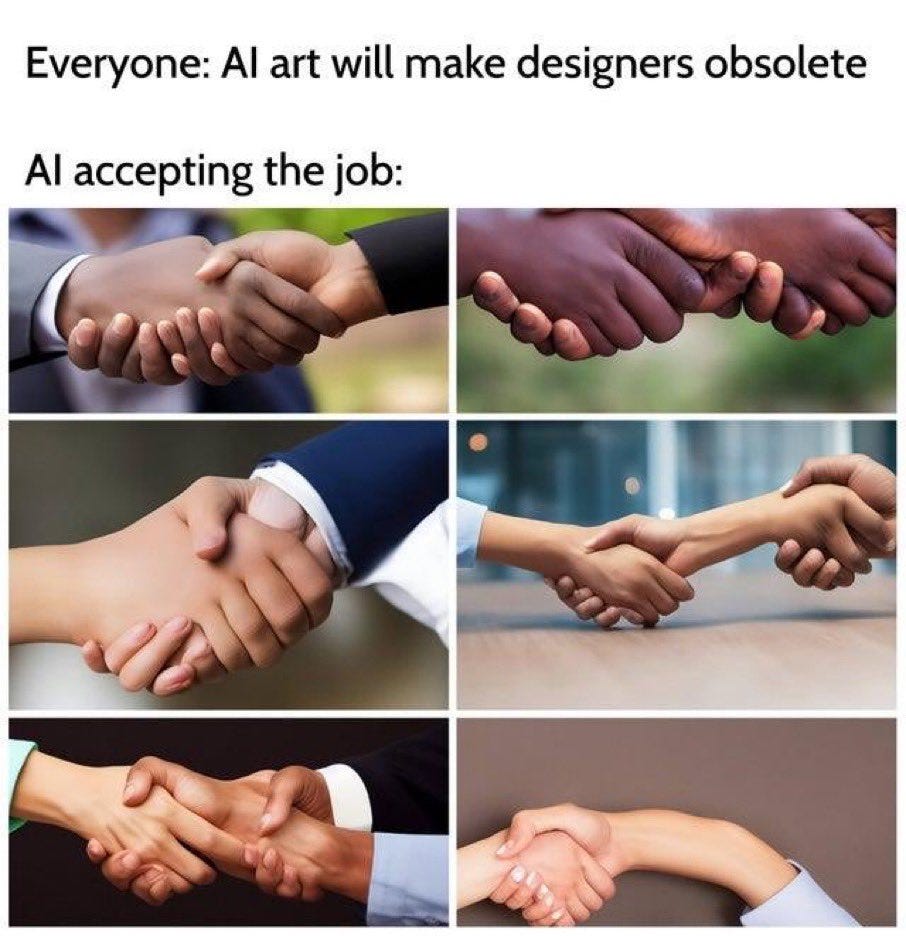
The DALL-E models are notoriously bad with hands and text inside images.
While the hand issue is less severe in DALL-E 3, text presented in images is still messy.
I’ve tried countless ways to fix these mistakes with different prompts, but nothing helped. I wish I knew it was a general problem with the model and that I shouldn’t bother with it.
I now ask the model not to include text inside the images.
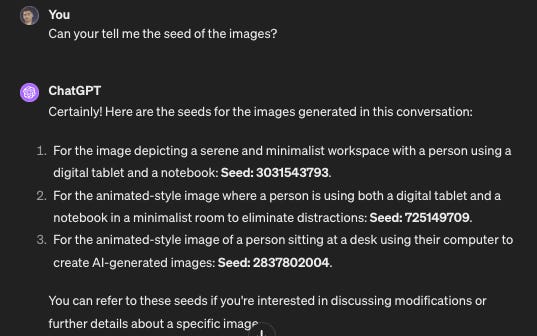
2. Modifying pictures with seed numbers
Sometimes, I had a long conversation with ChatGPT where I asked for multiple images and changes.
But if I wanted to modify an image from 3 messages ago, I didn’t know how to point the model to this exact picture.
Later, I learned about seed numbers.
I can ask the chat to show me the seed numbers for all the images that I’ve generated so far.
When I want to modify one of them, I would just state the seed number and share what I would like to change.
3. Don’t be lazy
When I first wanted to create images for my blog posts, I put in minimal effort to produce an image.
I shared the title of my article and asked the model to create an image I could use in the post.
For example, I could use this prompt to create an image for this article:
“I need a featured image for my article titled "5 Things I wish I Knew Before I Started Using DALL-E 3"“
And this will be the result:
These prompts were way too ambiguous for the AI to provide a good-quality image that would fit my post.
It’s a nice photo, but it seems unrealated to the subject of this article, which is how I learned to create beautiful images with AI on my computer.
I’ve learned to take the time to think about my image. How do I want it to look? What styles and elements should it incorporate?
Then, I wrote down a long and detailed prompt, which leads me to my next point.
4. The more information the better
Making an image involves many elements, and if I don’t tell the model what these elements should be, I leave it to it interpretation.
And I often didn’t like these interpretations.
This is where I learned about more details I can add to my prompts to make it more accurate and better resemble what I had in mind.
I specify things like:
Atmosphere
Lightning
Time of day
Background
Colors
Context
I try to put myself in the eyes of the photographer and describe the scene of the photo.
Bonus: Learning from great outputs
One tiny thing I’ve learned recently is that ChatGPT takes my prompt and before it makes the image, it makes a better and more detalied prompt by itself.
I can use the “?” icon after clicking on a picture that I like, and see what made that image so great.
I later use these words and phrases when I create images and I improve my prompting skill.


